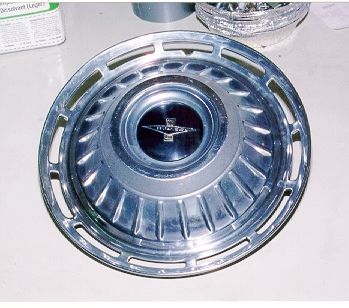
 Cap
dedented, cleaned, degreased, center emblem is secured and repainted
on the back.
Cap
dedented, cleaned, degreased, center emblem is secured and repainted
on the back.Hubcap Repair and Repaint
A bit of repair, polish, and paint can spiff up a set of old hubcaps so they won't look out of place on your newly painted car. On my 63 Spyder the hubcaps were on the car when I got it but they needed a bit of TLC:
A rattling noise over bumps was traced to loose center emblems on all four caps. Bending the center cap retainer tabs tighter against the emblems did not solve the problem. I used a bit of orange Form-a-Gasket silicone around the emblems inside the cap to hold them securely. It made things a lot quieter.
The emblems were also a bit ratty looking. A quick spray of semi-flat black paint on the back of the emblem makes them look better from the front.
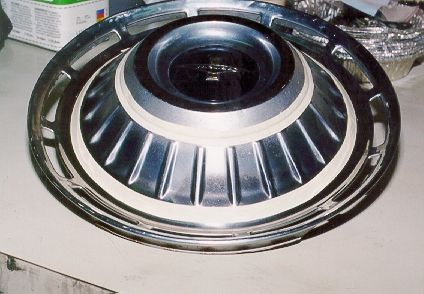
Fortunately the caps were not badly dented so I did not have to perform any serious 'bodywork' on them. Most dents can be just pushed out from the inside of the cap.
Once you've got the caps nice and straight, clean them up to remove all dirt, tar, grease, etc from the outside. I washed them with soap and water, then cleaned with a mild autobody type solvent cleaner. You can use lacquer thinner or whatever you like as long as you keep it off the plastic center emblems.
Mask the caps as appropriate for your year and model. It's difficult to find references for what is 'exactly right'; I've even looked at several identical cars with original caps and seen differences in paint patterns. So I can't guarantee that the 63 Monza caps below are exactly right but they look good. The masking may look intimidating but once you do the first three you'll be good at it. The following photos show the masking process and results:
Cap
dedented, cleaned, degreased, center emblem is secured and repainted
on the back.
 Start
of masking. Use a flexible tape with lots of stretch. The area
between the tapes will be semi-flat black; the raised areas will not
be painted.
Start
of masking. Use a flexible tape with lots of stretch. The area
between the tapes will be semi-flat black; the raised areas will not
be painted.
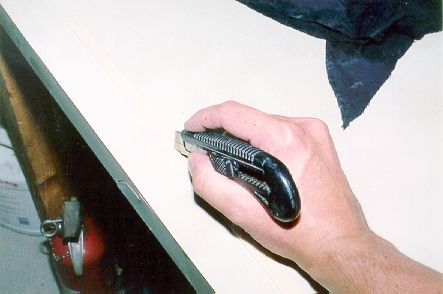 A
poor picture. I didn't have ¼" masking tape so I streched
the ½" tape on my arborite workbench top and sliced down
the middle. It took about 5' of ¼" tape for each
hubcap.
A
poor picture. I didn't have ¼" masking tape so I streched
the ½" tape on my arborite workbench top and sliced down
the middle. It took about 5' of ¼" tape for each
hubcap.
 ¼"
tape covers up the raised areas between the first tapes.
¼"
tape covers up the raised areas between the first tapes.
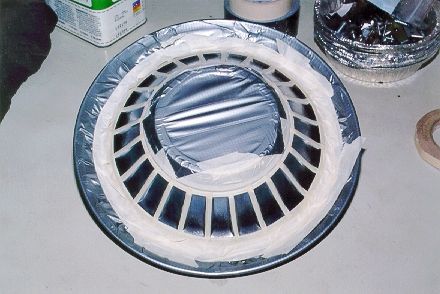 Remaining
area masked off. I used duct tape as it was very flexible to go
around the rounded areas. The black areas are what will be painted.
Remaining
area masked off. I used duct tape as it was very flexible to go
around the rounded areas. The black areas are what will be painted.
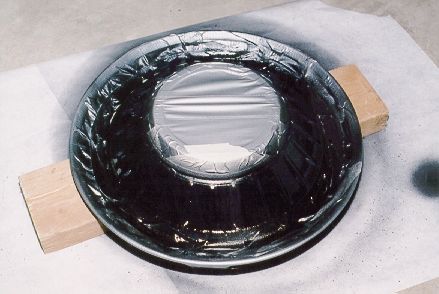 Spray
with an etching primer, then with semi-flat black paint. It took two
coats of black to cover adequately.
Spray
with an etching primer, then with semi-flat black paint. It took two
coats of black to cover adequately.
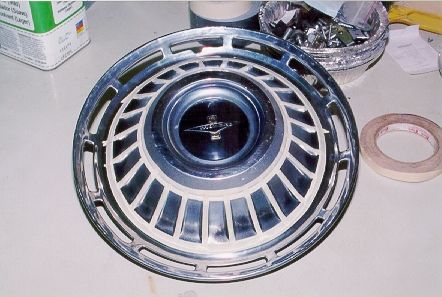
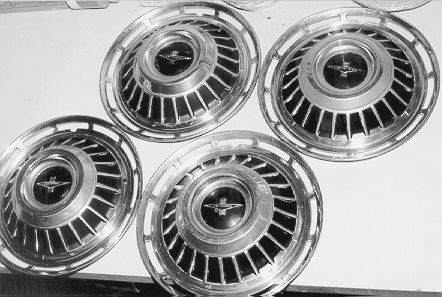 After
painting and demasking. It took about 2.5 hours to clean, mask, and
paint all four caps.
After
painting and demasking. It took about 2.5 hours to clean, mask, and
paint all four caps.