The
Spyder Project
My
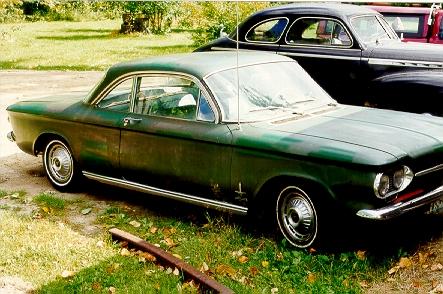
1963 Spyder was purchased to use as a 'driver' while I completed
restoration on my 65 Corsa convertible. However, one thing led to
another and I ended up spending two years of spare time fixing up the
Spyder, while the Corsa remained in storage.
There
are lots of photos below, so please be patient while the page loads.
It takes about two minutes with a 48k connection.This page will be
split into several as I get the time.
 The
car was purchased in northern Minnesota from a gentleman who had
retrieved it and done an admirable job of getting it back on the
road. It was a solid northern US car with very little rust, but it
had four different paint jobs, all of which you could see at some
point on the car. The complete brake system had been rebuilt and it
had a new Dale clutch.
The
car was purchased in northern Minnesota from a gentleman who had
retrieved it and done an admirable job of getting it back on the
road. It was a solid northern US car with very little rust, but it
had four different paint jobs, all of which you could see at some
point on the car. The complete brake system had been rebuilt and it
had a new Dale clutch.
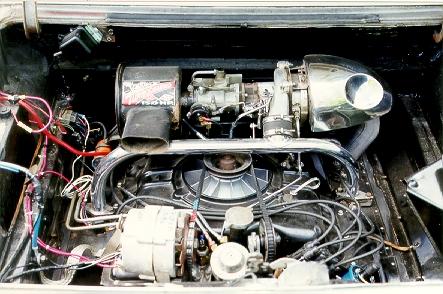 It
had a genuine Spyder engine in it, with the correct YR engine block,
the correct part numbered carburetor, correct turbo, etc. The diff
was an HA code 3.27. The ID tag showed the car to have the Spyder
option and the padded dash. It had been converted to an alternator,
and had the electric choke and Crane electronic ignition added. The
four speed transmission was very reluctant to find second gear.
It
had a genuine Spyder engine in it, with the correct YR engine block,
the correct part numbered carburetor, correct turbo, etc. The diff
was an HA code 3.27. The ID tag showed the car to have the Spyder
option and the padded dash. It had been converted to an alternator,
and had the electric choke and Crane electronic ignition added. The
four speed transmission was very reluctant to find second gear.
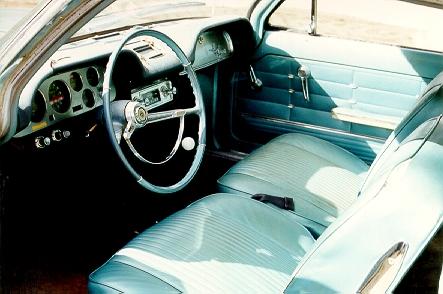 The
interior was 'all there' with the exception of the front carpet., but
the padded dash was past saving, as were all the interior upholstered
items. The missing front carpet revealed a solid floor pan with some
surface rust and minor perforations in the bottom of the grooves in
the floor pan. The radio worked, more or less, the speedometer needle
was laying in the bottom of the speedometer, and some of the other
electrics were absent. The windshield was cracked top to bottom as
well.
The
interior was 'all there' with the exception of the front carpet., but
the padded dash was past saving, as were all the interior upholstered
items. The missing front carpet revealed a solid floor pan with some
surface rust and minor perforations in the bottom of the grooves in
the floor pan. The radio worked, more or less, the speedometer needle
was laying in the bottom of the speedometer, and some of the other
electrics were absent. The windshield was cracked top to bottom as
well.
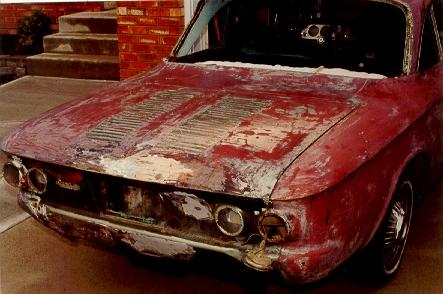
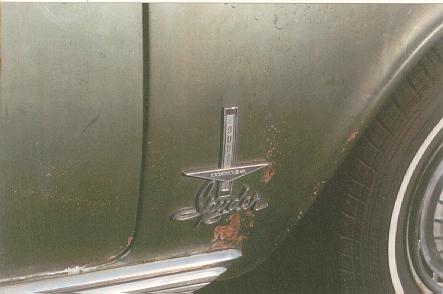 Minor
rust showed on the right front fender but the left was solid. This
little patch of rust turned into a 3" x 6" hole when the
paint was stripped.
Minor
rust showed on the right front fender but the left was solid. This
little patch of rust turned into a 3" x 6" hole when the
paint was stripped.
 I
drove the car 5 hours home from northern Minnesota to Winnipeg,
Manitoba. No problems at Canada Customs importing the vehicle, when I
showed up at the border the customs officer charged out with a big
grin on his face and said "Hey! That's a Spyder! I haven't seen
one for years!". Sign the paperwork, pay the Canadian taxes, and
away I went.
I
drove the car 5 hours home from northern Minnesota to Winnipeg,
Manitoba. No problems at Canada Customs importing the vehicle, when I
showed up at the border the customs officer charged out with a big
grin on his face and said "Hey! That's a Spyder! I haven't seen
one for years!". Sign the paperwork, pay the Canadian taxes, and
away I went.
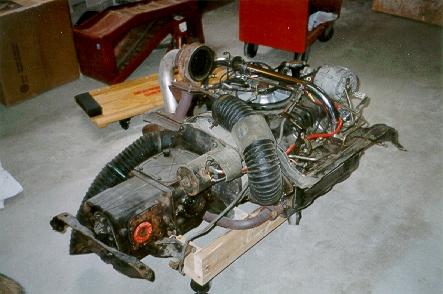
I repaired the problems the car came with, got it
safetied and licensed, and drove it for a year. A nagging click
turned into an engine knock and when it got on my nerves I pulled the
engine and took it apart. I found half a dozen internal problems
ranging from worn valve guides to loose wrist pins, and spent the
winter of 98-99 rebuilding the engine.
For a break-in trip the
next summer I drove to Edmonton ( 1500 miles round trip ) to a little
get together with several other builders of Canadian Corvair
convertibles; you can see some pics at Kent Sullivan's page here:
Group Canuck 99
Meet.
 Of
course, now with the engine running so well it was a shame to leave
the car looking so ratty, so in the winter of 99-2000 I undertook to
get it painted. After quotes ranging from $3000-$5500 for body and
paint I determined that I would need to do as much of the work myself
as possible, and probably would end up doing it in my
garage.
Of
course, now with the engine running so well it was a shame to leave
the car looking so ratty, so in the winter of 99-2000 I undertook to
get it painted. After quotes ranging from $3000-$5500 for body and
paint I determined that I would need to do as much of the work myself
as possible, and probably would end up doing it in my
garage.
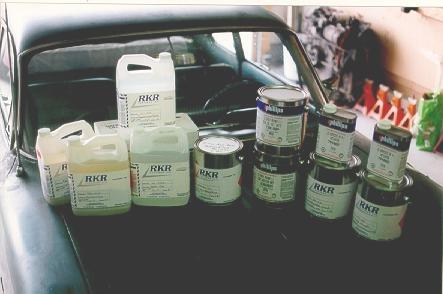
Because safety was an issue, I did some research and
found an isocyanate-free paint system that required only a respirator
mask for application. This was the Phillips Acrycote system, made
here in Winnipeg for heavy duty industrial use. It's used for
railroad cars, aircraft, heavy machinery, etc. It is described as an
'acid curing acrylic enamel' and requires that a hardener be mixed
with the paint to start the cure. The complete system was purchased
from RKR Coatings in Winnipeg. We colour matched to the original
paint under the trunk lid and found a perfect match to the original
Satin Silver.
It takes gallons of material to paint a Corvair.
From left to right in the photo we have:
Phosphoric acid based
metal treatment, methylene chloride based paint stripper, lacquer
thinner for cleaning and thinning the epoxy primer, enamel reducer
for reducing the finish coats, wash primer, the Phillips epoxy primer
and activator, the Acrycote colour and activator, and the Acrycote
clear coat and hardener.
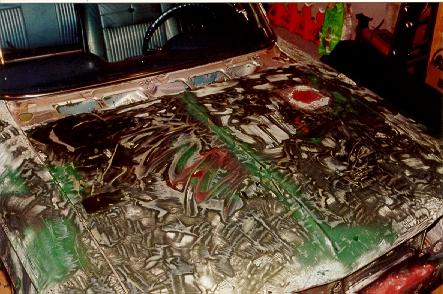 The
first attempt at removing the old paint was with a "safer"
kind of mild stripper. It just didn't touch the sunbaked old paint. I
went back for a couple gallons of the strong stuff, which pulled the
paint off layer by layer. I found layers of light green, dark green,
medium metallic blue, and finally the original Satin Silver as
advertised on the body tag.
The
first attempt at removing the old paint was with a "safer"
kind of mild stripper. It just didn't touch the sunbaked old paint. I
went back for a couple gallons of the strong stuff, which pulled the
paint off layer by layer. I found layers of light green, dark green,
medium metallic blue, and finally the original Satin Silver as
advertised on the body tag.
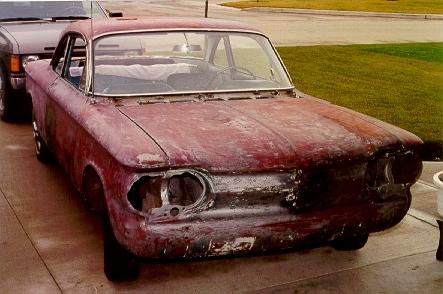 Here
we have the car almost completely stripped. Yes, the windshield and
the rest of the trim were eventually removed. The methylene chloride
stripper just softened the factory primer slightly but did not remove
it.
Here
we have the car almost completely stripped. Yes, the windshield and
the rest of the trim were eventually removed. The methylene chloride
stripper just softened the factory primer slightly but did not remove
it.
 I
uncovered some bondo in the rear end, the car had been in a minor
rear end collision at some point, leaving repairs to the area between
the license plate and right side backup light, to the engine lid
above this, and to the area beneath the bumper. This was all ground
out to bare metal as repairs proceeded.
I
uncovered some bondo in the rear end, the car had been in a minor
rear end collision at some point, leaving repairs to the area between
the license plate and right side backup light, to the engine lid
above this, and to the area beneath the bumper. This was all ground
out to bare metal as repairs proceeded.
It took my dad and I
two 12 hour days ( ie 48 man hours ) to complete the entire paint
stripping job - basically to get the car to the point you see in the
next photo.
 Because
the stripper did not remove the primer, the primer was removed using
a fabric paint stripping disk in my angle grinder. The Norton AVOS
pads are similar to a Scotchbrite scrubber but have holes in them so
you can see the surface on which you are working.
Because
the stripper did not remove the primer, the primer was removed using
a fabric paint stripping disk in my angle grinder. The Norton AVOS
pads are similar to a Scotchbrite scrubber but have holes in them so
you can see the surface on which you are working.
The roof was
sanded by hand to prevent any possible heat warpage.
At this
point I lucked out, and found a local high school that offered an
evening Auto Body course. I signed up for two sessions in a row (18,
3 hour evenings ) and used their training and equipment to complete
the job.
After body work was completed, the complete body was
wiped down with metal prep, wiped again with lacquer thinner, then
given coats of finish in this order:
Wash primer, epoxy
primer, hi-fill primer/surfacer ( resand whole car ), another coat of
epoxy, the Acrycote silver, and the final clear coat.
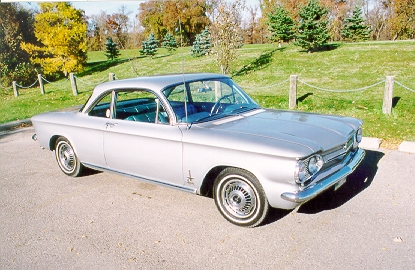 It
was a ton of work but I think the results were worth it!
It
was a ton of work but I think the results were worth it!
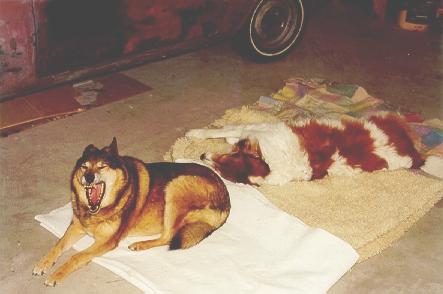 Caution:
The garage and car shown in these photos are guarded by vicious
attack dogs!
Caution:
The garage and car shown in these photos are guarded by vicious
attack dogs!
*Home*